Benefits of DIY Hair Masks
Nourishing properties of natural ingredients
Using DIY hair masks can provide numerous benefits for your hair. One of the major advantages is the use of natural ingredients that possess nourishing properties. Many store-bought hair products contain harsh chemicals that can strip the hair of its natural oils and lead to dryness and damage. However, DIY hair masks allow you to customize the ingredients and use natural products that are known to nourish and revitalize the hair.
Common natural ingredients used in DIY hair masks include coconut oil, avocado, honey, yogurt, eggs, and aloe vera. These ingredients are packed with essential vitamins, minerals, and fatty acids that can help moisturize and strengthen your hair.
By using DIY hair masks, you can avoid the negative effects of chemicals found in commercial hair products and instead enjoy the nourishing benefits of natural ingredients.
Benefits of using DIY hair masks
There are several benefits of incorporating DIY hair masks into your hair care routine:
- Increased moisture: DIY hair masks can help moisturize and hydrate dry hair, leaving it softer and more manageable.
- Improved hair health: The natural ingredients in DIY hair masks can provide essential nutrients to your hair, promoting overall hair health and minimizing damage.
- Enhanced shine: DIY hair masks can help restore the natural shine and luster of your hair, making it look healthier and more vibrant.
- Reduced frizz: The nourishing properties of DIY hair masks can help tame frizzy hair by providing hydration and smoothing the hair cuticles.
- Strengthened hair: DIY hair masks can help strengthen the hair follicles and reduce breakage, leading to longer and thicker hair over time.
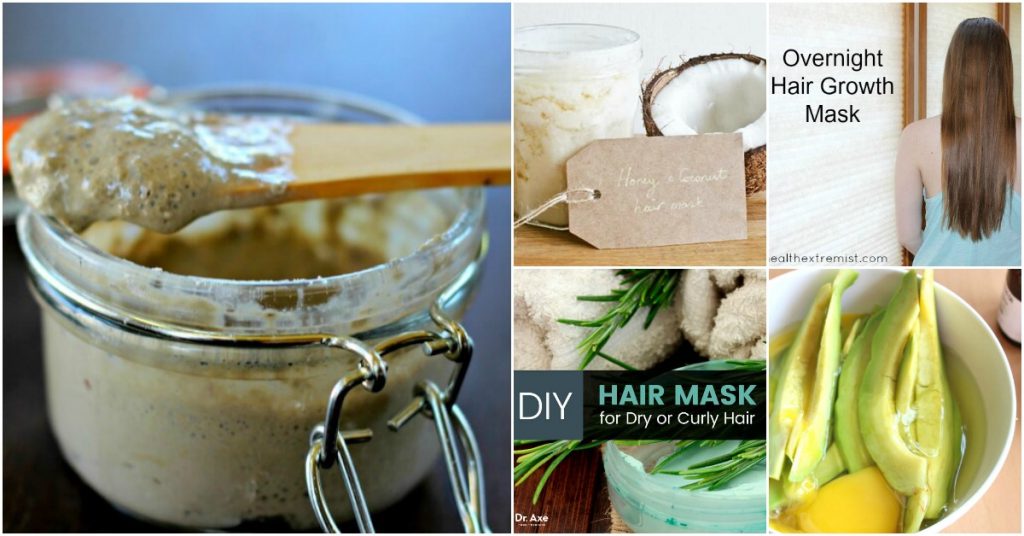
Popular Ingredients for DIY Hair Masks
When it comes to creating DIY hair masks, there are several popular ingredients that you can incorporate:
- Coconut oil: Coconut oil is deeply moisturizing and can help repair damaged hair.
- Avocado: Avocado is rich in healthy fats and vitamins that can nourish and hydrate the hair.
- Honey: Honey is a natural humectant and can help lock in moisture, making your hair softer and smoother.
- Yogurt: Yogurt contains lactic acid, which can help cleanse and exfoliate the scalp, promoting healthy hair growth.
- Eggs: Eggs are rich in protein, which can strengthen the hair strands and promote hair growth.
- Aloe vera: Aloe vera has soothing and moisturizing properties, helping to reduce scalp irritation and dandruff.
How to Make and Apply DIY Hair Masks
Step-by-step guide to creating a hair mask
Creating a DIY hair mask is a simple and enjoyable process. Follow these steps to make your own customized hair mask:
- Choose your ingredients: Select the ingredients based on your hair type and the specific benefits you want to achieve. For example, if you have dry hair, you may want to use ingredients such as avocado and coconut oil for their moisturizing properties.
- Combine the ingredients: In a bowl, mix the ingredients together until they form a smooth and consistent paste. Use a fork or a blender to ensure all the ingredients are well-blended.
- Test the mask: Before applying the hair mask to your entire head, perform a patch test on a small section of your hair or scalp to ensure that you do not have any adverse reactions to the ingredients.
- Apply the mask: Divide your hair into sections and use your fingers or a brush to evenly distribute the hair mask from the roots to the ends. Make sure to saturate your hair thoroughly with the mask.
- Massage the scalp: Gently massage the hair mask into your scalp using circular motions. This can help stimulate blood flow, promote hair growth, and ensure that the mask is evenly distributed.
- Leave the mask on: Depending on the ingredients used, leave the hair mask on for the recommended duration. This can range from 20 minutes to overnight. Cover your hair with a shower cap or towel to enhance the absorption of the mask.
- Rinse and wash: After the recommended time has passed, rinse your hair thoroughly with lukewarm or cool water. Follow up with a gentle shampoo and conditioner to remove any residue from the mask. Style your hair as desired.
How to apply the hair mask
When applying the hair mask, keep the following tips in mind for optimal results:
- Start from the roots: Begin applying the hair mask from the roots and work your way down to the ends. This will ensure that your scalp receives the maximum benefits of the mask.
- Use a wide-toothed comb: Use a wide-toothed comb to comb through your hair after applying the mask. This will help distribute the mask evenly and detangle any knots or tangles.
- Apply heat (optional): If desired, you can apply heat to your hair while the mask is on. Cover your hair with a shower cap and use a hairdryer or a heated towel to generate heat. This can help the mask penetrate deeper into the hair shaft.
- Protect your clothes and surroundings: Hair masks can be messy, so it’s important to protect your clothing and the surrounding area. Wear an old t-shirt or cover yourself with a towel and place a towel on the floor to catch any drips.
Tips for Using DIY Hair Masks
Here are some additional tips to maximize the effectiveness of your DIY hair masks:
- Choose ingredients wisely: Select ingredients based on your hair type and specific concerns. For example, if you have oily hair, avoid ingredients that are too heavy or greasy, such as coconut oil.
- Experiment with different recipes: Don’t be afraid to try different combinations of ingredients to find the perfect hair mask recipe for your hair. Keep track of the recipes that work well for you and make adjustments as needed.
- Be consistent: Like any hair care routine, consistency is key. Incorporate DIY hair masks into your regular routine to see long-term results. Aim to use a hair mask at least once a week, or more frequently if your hair is particularly damaged or dry.
- Don’t overdo it: While DIY hair masks can be beneficial, it’s important not to overdo it. Using hair masks too frequently or leaving them on for too long can lead to product buildup and may actually do more harm than good.
- Address specific concerns: If you have specific hair concerns, such as dandruff or hair loss, look for hair mask recipes that target those issues. Ingredients such as tea tree oil or rosemary oil can help address certain scalp conditions.
DIY Hair Mask Recipes for Different Hair Types
Hydrating Hair Mask for Dry Hair
If you have dry hair that lacks moisture, try this hydrating hair mask recipe:
Ingredients:
- 1 ripe avocado
- 2 tablespoons of honey
- 2 tablespoons of coconut oil
Instructions:
- Mash the avocado in a bowl until it becomes smooth.
- Add honey and coconut oil to the mashed avocado and mix well.
- Apply the mask to your hair, starting from the roots and working your way down to the ends.
- Leave the mask on for 30 minutes to an hour.
- Rinse your hair thoroughly with lukewarm water and follow up with a gentle shampoo and conditioner.
This hydrating hair mask can help restore moisture to dry hair, leaving it softer and more manageable.
Strengthening Hair Mask for Damaged Hair
If you have damaged hair that needs some extra care, try this strengthening hair mask recipe:
Ingredients:
- 1 ripe banana
- 1 tablespoon of almond oil
- 1 tablespoon of honey
- 1/2 cup of plain yogurt
Instructions:
- Mash the banana in a bowl until it becomes smooth.
- Add almond oil, honey, and yogurt to the mashed banana and mix well.
- Apply the mask to your hair, making sure to focus on the damaged areas.
- Leave the mask on for 20-30 minutes.
- Rinse your hair thoroughly with lukewarm water and follow up with a gentle shampoo and conditioner.
This strengthening hair mask can help repair damaged hair, improve its elasticity, and prevent further breakage.
Table Breakdown: Benefits of DIY Hair Masks
| Benefit | Description |
|---|---|
| Increased moisture | Hydrates and moisturizes dry hair, making it softer and more manageable. |
| Improved hair health | Nourishes the hair with essential nutrients, promoting overall hair health and minimizing damage. |
| Enhanced shine | Restores the natural shine and luster of the hair, making it look healthier and more vibrant. |
| Reduced frizz | Tames frizzy hair by providing hydration and smoothing the hair cuticles. |
| Strengthened hair | Strengthens the hair follicles, reducing breakage and promoting longer and thicker hair over time. |
FAQs about DIY Hair Masks
Q: Can DIY hair masks help with hair growth?
A: DIY hair masks can help promote hair growth indirectly by providing essential nutrients and improving overall hair health. However, they cannot stimulate hair growth on their own.
Q: How often should I use a DIY hair mask?
A: The frequency of using a DIY hair mask depends on your hair type and its specific needs. In general, using a hair mask once a week is a good starting point. You can adjust the frequency based on how your hair responds to the treatment.
Q: Can I leave a DIY hair mask on overnight?
A: Some DIY hair masks can be left on overnight. However, it’s important to ensure that the ingredients used in the mask are safe for overnight use and won’t cause any irritation or damage to the hair or scalp.
Q: Can I use a DIY hair mask if I have oily hair?
A: Yes, but it’s important to choose ingredients that are lightweight and won’t weigh down the hair or make it greasy. Avoid using heavy oils and opt for ingredients such as aloe vera or apple cider vinegar, which can help balance the scalp’s natural oils.
Q: How long will it take to see results from using DIY hair masks?
A: Results from using DIY hair masks can vary depending on various factors, including the condition of your hair, the ingredients used, and the frequency of application. Consistency is key, and you may start noticing improvement in your hair’s texture and appearance after a few weeks of regular use.
Q: Can I store leftover DIY hair masks for future use?
A: It’s best to use DIY hair masks immediately after preparing them to ensure maximum freshness and effectiveness. However, if you have leftover mask, you can store it in an airtight container in the refrigerator for up to a week. Before using it again, check the consistency and smell to ensure it hasn’t spoiled.
Q: Can I apply a DIY hair mask to my scalp?
A: Yes, you can apply a DIY hair mask to your scalp. However, be mindful of ingredients that may cause scalp irritation or allergic reactions. Perform a patch test before applying the mask to your entire scalp to check for any adverse reactions.
Q: Are there any natural ingredients to avoid in DIY hair masks?
A: Some natural ingredients may cause allergic reactions or scalp irritation in certain individuals. Examples include cinnamon, citrus fruits, and certain essential oils. If you have sensitive skin or known allergies, it’s best to do a patch test before using any new ingredient.
Q: Can I combine different DIY hair masks?
A: Yes, you can experiment with combining different DIY hair masks to tailor the treatment to your specific hair needs. However, be cautious of ingredient interactions and ensure that the combination is safe and won’t cause any adverse effects.
Q: Can DIY hair masks repair split ends?
A: DIY hair masks cannot repair split ends completely, as the only way to eliminate split ends is by trimming them. However, regular use of DIY hair masks can help prevent further damage and improve the overall appearance and texture of split ends.
Conclusion
Nourishing your hair and achieving healthy, shiny tresses doesn’t have to involve expensive salon treatments or chemical-laden products. DIY hair masks provide a natural and customizable solution to address various hair concerns and enhance the overall health and appearance of your hair. By using readily available ingredients and following simple recipes, you can create effective hair masks at home that nourish, moisturize, and strengthen your hair. So, unlock the potential of natural ingredients and give your hair the love and care it deserves with DIY hair masks. Get creative, experiment with different recipes, and enjoy the benefits of healthy and shiny tresses!